


Greetings, earthlings! As promised, this week’s tutorial will put everything we’ve learned together in constructing a simple outline for your forex expert advisor. If any of the terms sound alien to you, just make sure you review the lessons we’ve covered so far.
I. Variables
Before cooking up your recipe for pips (reci-pips?) you gotta make sure you’ve got the necessary ingredients ready. It’s good practice to determine your variables and their corresponding data types from the get-go, right at the header of the code. Don’t worry if you forget any though, you can still be able to add ’em in the middle of the program.
To simplify things, you can start off with the standard inputs for your stop loss, profit target, lot size, and technical indicator settings. Of course you can also opt to have these as customizable external inputs, too.
II. Indicators
The next step is to figure out which technical indicators you’ll be needing for your forex EA. As I’ve mentioned in the tutorial on adding indicators, you don’t really have to come up with the code for these since MQL4/MQL5 comes with a bunch of technical indicator functions already.
Take note that these technical indicator functions return values (ex: RSI value of 43 or slow moving average value of 120.50) that you’d need to store. You can declare the corresponding variable and assign its value to the indicator as soon as you call the function:
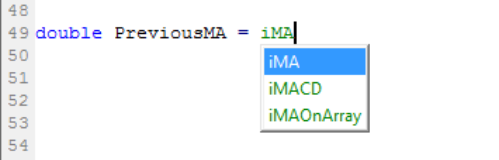
Don’t forget to input the necessary details under each technical indicator function based on the proper syntax that you can find by hitting F1 or checking out the MQL4 documentation for indicators.
III. Entry Conditions
Here’s where things get interesting! Now that you’ve got your variables and technical indicators set, you can start specifying the conditions in which a buy or sell signal will be generated. This is where your if-else and for statements come in.
If it helps, you can first jot down the entry conditions in normal non-robot language so that you can easily translate this to code later on. It can get pretty tricky when you have several conditions that must be satisfied (ex: Upward MA crossover and RSI < 50) for signals to be generated, which means you’ll need to use compound operators also.
IV. Order Details
The last bit is all about adding the specific order details inside your entry conditions. For instance, if you used the if-else statement in setting your buy or sell conditions, you have to create your order inside those statements, like so:
If (long entry conditions)
{
OrderSend();
}
or
If (short entry conditions)
{
OrderSend();
}
Don’t forget to fill in the necessary inputs inside the OrderSend() function also, and this is where you can simply input the variables for your stops, targets, and position sizes. As I’ve mentioned in my three-part tutorial series on opening orders for your forex EA, there might be a few extra steps you need to take to adjust for pip values!
Sounds simple enough, right? Can you believe you’re on your way to code your very first expert advisor? Next week, we’ll work on coding Huck’s HLHB Forex Trend-Catcher System so I’ll see ya then!